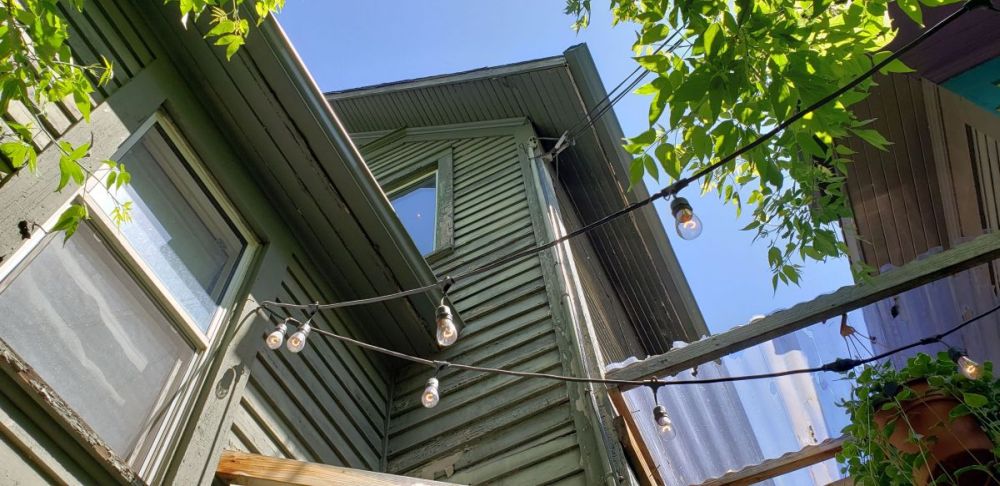
Guttering is one of those things that gets ignored until there's a problem. Damage to walls of foundations can occur as gutters and downpipes are not working properly due to blockage or leaking. But, despite how simple it is to keep the gutters in good functioning order, they are often ignored because of their inaccessibility. Small holes can be patched with silicone, and gutter guards can keep leaves from accumulating in the first place.
If the damage is severe, though, and the guttering is rusty or pulling toward the wall, it's best to replace the damaged areas or build a new system. To install new guttering, you must first remove the existing guttering and brackets, then fix any damage to the fascia and refinish it with paint.
It is important to take into account the rainfall intensity, top catchments, gutter size, intake plenum parameters, and overflow capacity when designing a gutter system to handle the volume of water discharge that spills as from roof. In order to determine how much guttering will be needed, measure the widths of fascia runs or draw a scale design of the home, making sure to discreetly mark the locations of the desired number of downspouts.
National Australian Plumbing and Drainage Code AS/NZS 3500.3-2003, which can be found in your local library, specifies that your gutters must meet certain requirements. Gutter fall to downspout must be at least 1:500, or 2mm for every metre of gutter. Have a conversation with your vendor to be sure a gutter system you're considering buying will fulfil your needs.
Hiring mobile scaffolding will make working at heights safer and more convenient. In some parts of Australia, professional tradespeople are legally required to install gutters, so it's important to double-check with the local government before getting started.
Types Of Guttering
 There are several options for guttering, however some of them aren't practical for do-it-yourselfers to install:
- DIY installation is a breeze with plastic guttering. It's made to be a cinch to slice and snap together with ease.
- DIY guttering made of aluminium or zinc-aluminum is possible. Although it requires a bit more effort to install than vinyl guttering, it is still doable by the average homeowner with the correct equipment.
- Due to the necessity of welding, galvanised steel is not a good choice for a do-it-yourself project.
- Because of its durability, stainless steel requires expert installation.
- The installation of copper gutters is costly and should be left to the experts.
Plastic and aluminium are the two most common materials for DIY gutters, yet there is more you need to know. It's also crucial to pay attention to the guttering profile. Because of its "C" form, half-round guttering is effective at preventing leaves from settling in the gutter even in light rainfall areas. Quad guttering, on the other hand, may be preferable in extreme rain conditions. D-gutters, which are quadruple gutters, have a greater capacity for water collection. Guttering can also come with atop-mounted overflow ports to facilitate water management. In the case of a flood, the outflow spouts will direct the water away from the edge. These are some further examples of profiles:
- Fascia gutters are attached straight to the rafters of a roof. Fascia guttering can be found in a wide variety of powder-coated hues, and its external profiles can vary to better complement various architectural designs.
- Straight gutters have a rounded top and a rounded bottom.
- Expert installation is recommended for the completely concealed box gutters.
It's possible that half-round gutters are the simplest to set up. DIY installation is possible for quad and cornice guttering as well, but only if the guttering is specifically made for such work and comes with detailed instructions. What is the going rate for new guttering? Lists the costs associated with many guttering options. Powder-coated Zincalume gutters are the next least priced option, followed by PVC guttering.
FAQs About Installing Gutters
Sometimes, it's obvious when gutters need replacing. Large holes and leaks are the giveaway signs of a dysfunctional gutter. At this point, it's wise to start planning how you will replace them before any this damage spills into your home.
Other signs of a faulty gutter are less obvious, making them easy to miss. Gutters will usually rust from the inside out, so when inspecting your gutters be on the lookout for evidence of rust such as blistering paint and rough surfaces. Also, be on the lookout for birds hanging around your roof—they may be taking advantage of pools of water to bathe in!
Although many gutter systems have been designed in pieces, often, it is necessary to remove much more than just the affected piece. The work necessary to remove just a single piece of guttering may involve taking down large sections of gutting around the house. With the time and cost of removing and refitting a new gutter section, it may be worth considering replacing the entire guttering system, especially if your gutters are more than ten years old.
Appearance
Gutters are not just functional, but they also improve the look of your house! Consider what gutter shape and colour will match the look of your home.
Material
Gutters can be made of varying materials of varying quality, such as steel and aluminium. Generally speaking, the higher the quality of materials, the longer your gutters will last.
Technical Requirements
Gutters also need to do their job: diverting rain to stormwater. This means that your new gutters and downpipes need to be the correct size for your roof and meet plumbing and building requirements, such as:
- Tiled roofs in Melbourne need at least one 100x50mm downpipe for every 50m2 of roofing area. However, it may be easier for older homes to increase downpipe capacity than installing new downpipes.
- All plumbing work over the value of $750 will need to be carried out by a registered plumber. This plumber will also need to issue a compliance certificate.
- Fixings need to be compatible with guttering material and galvanised or zinc plated.
There are several risks of a DIY gutter installation, especially if you are inexperienced. As well as safety issues, a faulty guttering system can pose a serious risk to the appearance and structural integrity of your home.
Safety Risk
Installing new gutters means working at heights and using a ladder. Most people killed or injured due to ladder-related injuries were doing maintenance around the home.
Faulty Installation
A bad DIY gutter installation may end up costing much more than just going with a professional. Many expensive roofing faults are due to the improper installation of gutters.
Prosecution And Insurance Risk
Improper gutter installation can also have legal and insurance ramifications. For example, if compliance requirements are not met, such as plumbing requirements, insurance may be void in the event of water damage.
Getting Started With The Guttering Installation
Taking accurate measurements of your roof is the first step. If your house happens to have gutters, you'll need to measure the length of those, as well as the length of the downspouts and the depth from the gutters to the wall. This money is required to purchase the elbows. Making a layout and indicating where the downspouts will be installed is a smart idea. The supplier will be able to better assist you in making your purchase if you bring them the plan. You may want to buy longer guttering and downspouts than you actually need. Get all of your guttering materials then. Guttering kits typically include a lot more than the guttering, but the specifics may vary depending on the kind of drainages you purchase. You'll also need to pick up a few of the following:
- Connecting Elbows for Downspouts
- Water is channelled into sewers via downspouts and downspout shoes.
- Every 400 millimetres, a bracket should be built to support the weight of the water.
- Stop ends are installed at the gutter's termination to prevent water from overflowing.
There could be supplementary supplies required. To save making many trips, the vendor might offer guidance while you make your selections. Even if you plan on installing the gutters yourself, they can offer guidance on the best options. Try to find high-quality gutters that won't take too much time to put up.
Supplies aside from those already mentioned include:
- A ladder, or multiple ladders, with rungs high enough that you won't have to stand on them to get to where you now have to work
- Such as, say, a drill that operates on a cordless system
- A saber-type saw also known as a hacksaw
- String or Line
- To make pilot holes, you'll need either self-tapping screws or regular screws, as well as the appropriate size drill bit.
- Tin snips may be required for aluminium guttering.
Ladder work is inherently risky. Stand on the highest stair; no ladder needed. It's recommended that the top of the ladder be at least hand- or waist-high. Having this feature allows you to keep one hand on the top of the ladder at all times. Check for ladder stability before attempting to ascend. You need to make sure it's on a stable surface, or it might sink if you bend over to grab something.
It will be necessary to remove the old guttering before the new guttering can be installed. As simple as it sounds, this task is not always as easy as it seems. Get some long nails and bang them in at regular intervals to support the guttering while you take it down. Guttering will be secured, preventing it from being easily removed. Some brackets can be removed with a screwdriver, but others may require a hacksaw. You may wish to consider purchasing some rope for the purpose of gently lowering the outdated guttering to the ground.
Installing Guttering
 Gutters are often neglected because of their inconvenient location and the difficulty associated with keeping them clean. Yet, there will come a time when you need to work on your gutters, and when that time comes, you can use these instructions as a guide for either replacing or installing new guttering. Please don't hesitate to contact us at 1300 886 944 if you have any enquiries or would want to speak with someone about your project. Please see this link for more information on our extensive selection of guttering.
Pre-Assembly
- Gutter to every fascia run must be trimmed to the appropriate length. To do this, you can use either a hacksaw or tin snips. Connecting pieces should overlap by at least 100 millimetres along the flow axis.
- Go across the bottom and the sides of both the overlap with roof and gutter sealant. Invert the gutter and rivet it back together the right way. Make sure the sealant is applied around the screws and along the seam, and then smoothed out so that water may flow freely.
Attaching The Stop-Ends
- Set the stop ends in place and pre-drill the rivet holes. Two holes mostly on back, two across the bottom, and two on the front are optimal.
- Seal the overlap with a bead of sealant, then position the end stop and rivet it in place. At last, give the rivets a little coating of sealant.
- Stop-ends are available on the left and right, so double check that you have the appropriate ones.
Assemble The Spout
- The outlets of your downpipes must connect to the storm drains. Locate the outlet's centre by marking the gutter's base. Put the spout down flange first, then use a pencil to make cuts all the way around the inside. Wooden shims should be placed under the hole, and a chisel should be used to make an opening deep enough in the gutter for the use of tin snips. Then, using the tin snips, cut 1–2 millimetres away from the line you created.
- Observe that right-handed snips are coloured red, whereas left-handed snips are coloured green.
- The spout is inserted into the hole, and four pilot holes are drilled ahead of time on the flange's shorter sides to secure it with rivets. When you have drilled the hole, you can seal it by applying a bead of caulk around the perimeter. Anchor the spout in the glue and use rivets to keep it in place.
Preparing For A Mitre
At some point, you'll have to mitre your gutter. Mark the mitered corners with precise measurements.
Keep in mind that the front sides of an internal mitre are shorter than back sides. With an exterior mitre, the front sides are proportionally wider than the back.
- Take a measurement of the gutter's width and use that number to determine how wide to make the top edge of the back or front of your house. Put a dot here, and then draw a line at a 45-degree angle across the crosses to the other corner. It's recommended that you give the bracket an extra 5mm of space to work.
- Make sure the mitre fits there in corner bracket properly before you tighten it. When finished, use a caulking gun to seal the seam between the gutter and also the lower bracket. Internal bracket, temporarily clamped and tightened.
- WARNING: The upper internal component of the bracket should not be fastened in place until the remaining half of the ibm has already been positioned.
Hanging The Gutter
- Install a nail 10 mm below the top and sides of the fascia now at high end to establish the appropriate fall of your gutter. With a minimum roof fall of 1:50, calculate then nail one end, secure a rope between the pins, and measure the height difference using a spirit level.
- Brackets should be installed along the strings line with no more than a 1200mm gap between them, and then fastened using Bugle Allen head screws.
- Longer sections of gutter may require assistance being lifted. When using external brackets, fold the prong over the rolled edge at the top.
- To achieve the same effect, you can also utilise suspension clips.
Adding Downpipes
- In order to direct the performance exhaust to the back of the building, an offset is required for eaved structures. A slip joint option is available for purchase. In order to align the upper offset with the lower offset, the lower offset must be prepared and placed against the wall first.
- The best way to achieve this is to run a theodolite from the spout's outer border straight down the downpipe's side and make a mark. The centre of the top offset cut is the lowest point.
- The second section of downpipe is then utilised to make a 45-degree angle connection from the outlet pipe to the storm drain. Draw a circle around the downspout with the dimensions you'll need to get it within the storm drain.
- When you're done, make sure the lower downpipe portion is within the upper one. Set up such that the downspout is flush with the gutter. Fasten downpipe parts together at the back, then riveting the downpipe towards the spout. Using two clamps and masonry anchors, secure the performance exhaust to the wall.
Conclusion
Although guttering is difficult to reach, it is crucial to design a system that takes into account factors including rainfall intensity, catchment area, gutter size, plenum parameters, and overflow capacity. Gutter fall to downspout must be no less than 1:500, or 2mm for every metre of gutter, in accordance with the National Australian Plumbing and Drainage Code AS/NZS 3500.3-2003. Though there is a wide variety of guttering available, some of it isn't suited to DIYers. To be ready for new gutters, you need to take down the old ones, repair any damage to the fascia, and repaint it. For gutter installations to be considered lawful in some areas of Australia, skilled labour from a licenced tradesperson must be used.
Depending on your needs, you can choose between plastic and aluminium for your do-it-yourself gutters. While half-round gutters can be installed by a homeowner, more complicated styles like quad and cornice gutters should be left to the pros. Next to PVC guttering, powder-coated Zincalume gutters are the most cost-effective choice. Installing gutters begins with taking precise measurements of the roof, downspouts, and the distance from the gutters to the wall. Depending on the type of drainages you choose, guttering kits may include more than just the guttering itself.
A bracket should be constructed to hold up the downspout and downspout shoe as they direct water into the sewer. Tools and materials include a stepladder, a drill, a saber-style saw, a cord or line, self-tapping screws, and tin snips. It is wise to stand on the top rung of the ladder and examine it for sturdiness before attempting to climb it, as working at heights always carries some degree of danger. Get some long nails and hammer them in at regular intervals to support the guttering as you remove it so that you can then install the new guttering. The guttering will be fastened such that it cannot be simply taken down.
Due to their inconvenient location and maintenance requirements, gutters are often overlooked. When installing or replacing guttering, you should pre-assemble it using a hacksaw or tin snips and drill two holes into the back, two into the bottom, and two into the front of the stop ends. It is important to apply sealant around the screws and along the seam and smooth it out so that water may flow freely. Apply a bead of sealant to the overlap, set the end stop in place, and rivet it into place. Using a pencil, make incisions all the way around the interior of the outlet, and then use tin snips to cut 1-2 millimetres away from the line to complete the spout's assembly.
In order to rivet the flange together, four pilot holes are drilled on its shorter sides. The spout can be riveted and glued into place for added security. Your gutter's top edge, whether at the back or the front of the home, should be mitered to the appropriate width. Seal the joint between the gutter and the lower bracket, and give the bracket an extra 5 mm of room to work with. Gutter installation calls for a minimum roof fall of 1:50 and a nail placed 10 mm below the top and sides of the fascia.
Bugle Allen head screws should be used to secure the brackets in place at regular intervals along the string line, with no more than a 1200mm gap between them. Downpipes and external brackets can be attached by folding the top rolled edge over the clips. The lower offset must be ready and positioned against the wall before the upper offset can be aligned with it. After that, you may connect the outlet pipe to the storm drain at a 45-degree angle using the second downpipe part. Join the tailpiece and the downpipe using rivets, and then fasten the tailpiece to the downspout.
Content Summary
- The gutter profile should be carefully considered as well.
- The current guttering must be taken down before the new guttering can be installed.
- At some point, however, you'll want to do some maintenance on your gutters, and when that time comes, you may use these guidelines as a reference for putting up new guttering or repairing the old.
- Change the direction of the gutter and rivet it back together.
- Find the exact middle of the opening by marking the bottom of the gutter.
- The spout can be riveted and glued into place for added security.
- Gutter mitering is a task that must be completed at some point.
- Put a mark of exact dimensions on the mitered corners.
- Fold the prong over the rolled edge at the top when using external brackets.
- Putting in Downspouts For buildings with eaves, an offset is needed to point the performance exhaust out the back.
- Preparing and positioning the lower offset against the wall is a prerequisite to aligning the higher offset with it.
- There is a trough in the middle of the top offset cut.
- It is then possible to connect the output pipe to the storm drain at an angle of 45 degrees by using the second segment of downpipe.
- Installed so that the downspout meets the gutter at a 90 degree angle.
- Make sure the performance exhaust is fastened to the wall using two clamps and masonry anchors.